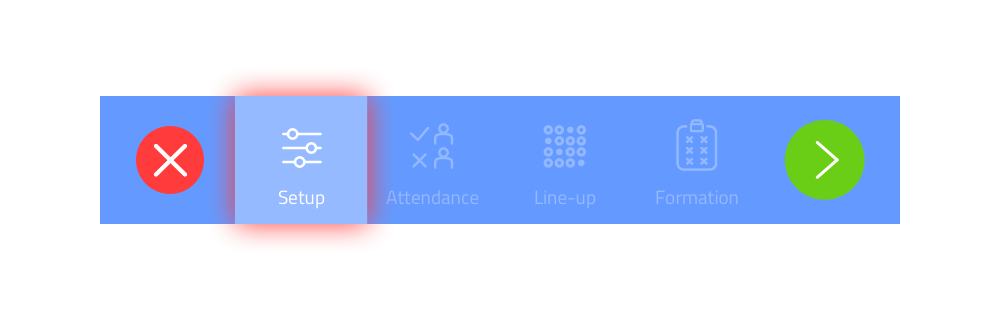
Set up a match
A new match: from scratch or via calendar link?
Press the red plus at the bottom right of the matches overview screen and you’ll start setting up a new match “from scratch”. But if you’ve implemented a calendar link, there will already be a number of matches ready for you, which you can finish setting them up.
A new match: start from scratch
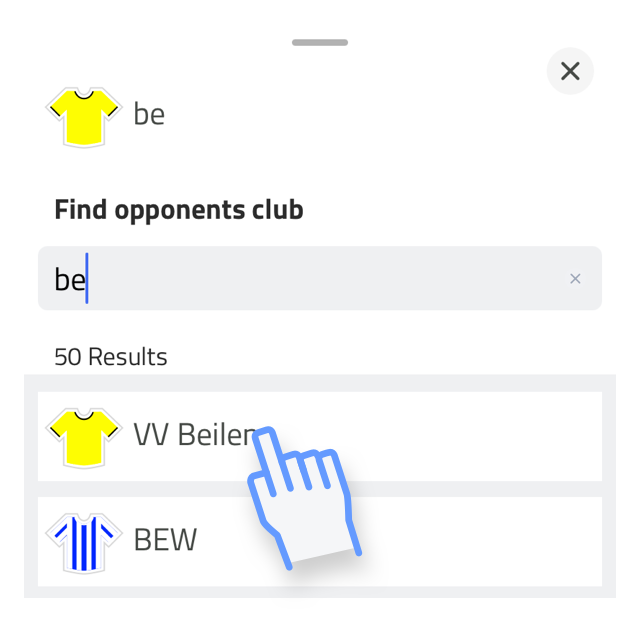
After pressing the red plus button you will enter the match wizard menu. You can now lookup the club name of the opponent. Depending on which association or federation you have entered in your preferences, you will be able to search in a list of known clubs.
You can of course also enter an unknown name, it is not mandatory to choose a club name from the list.
After entering the club name you will see the wizard menu at the bottom of the screen. We can now set up this match step by step.
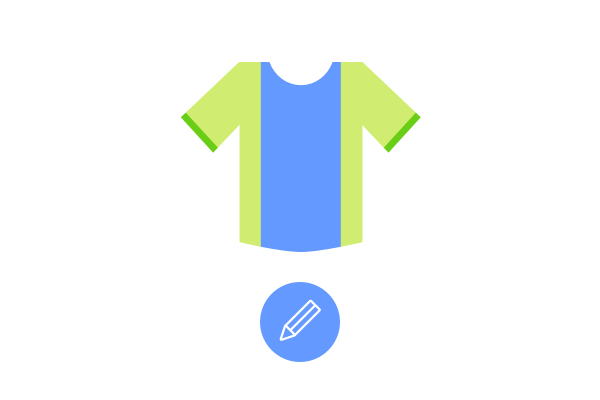
Press the pencil under the club shirt to adjust it.
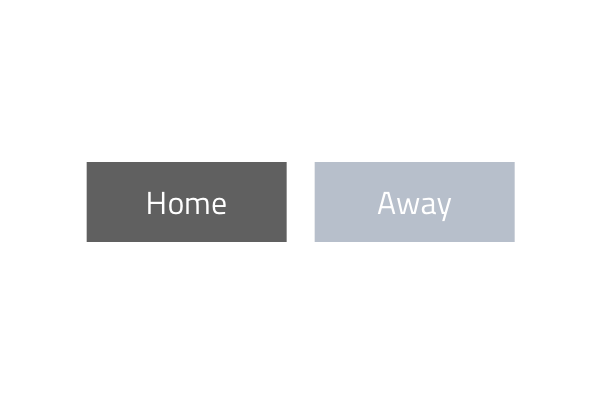
Indicate at least whether it concerns an away or home match. The other fields are optional!

Check that the match date, start time and match type are correct. Choose from league, cup or friendly match.
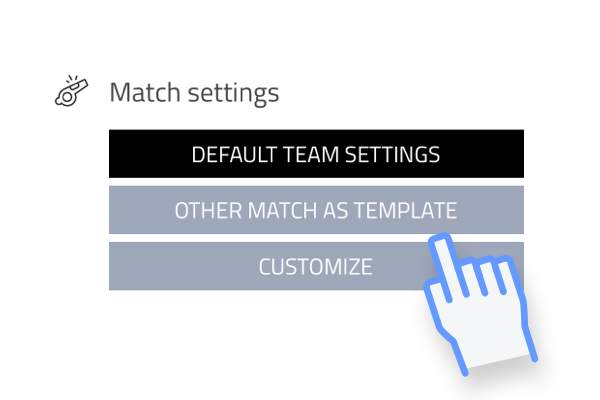
The “default team settings” have been applied to the match settings. These are the preferences that you have entered in “Team settings“.
If you want to adjust these, choose customize here and make the desired changes. But you can also choose ‘choose a match as template‘. Then you take over all the settings (including player list, line-up, substitution blocks and formation) in one go and you’re done in no time. This is a Premium feature.
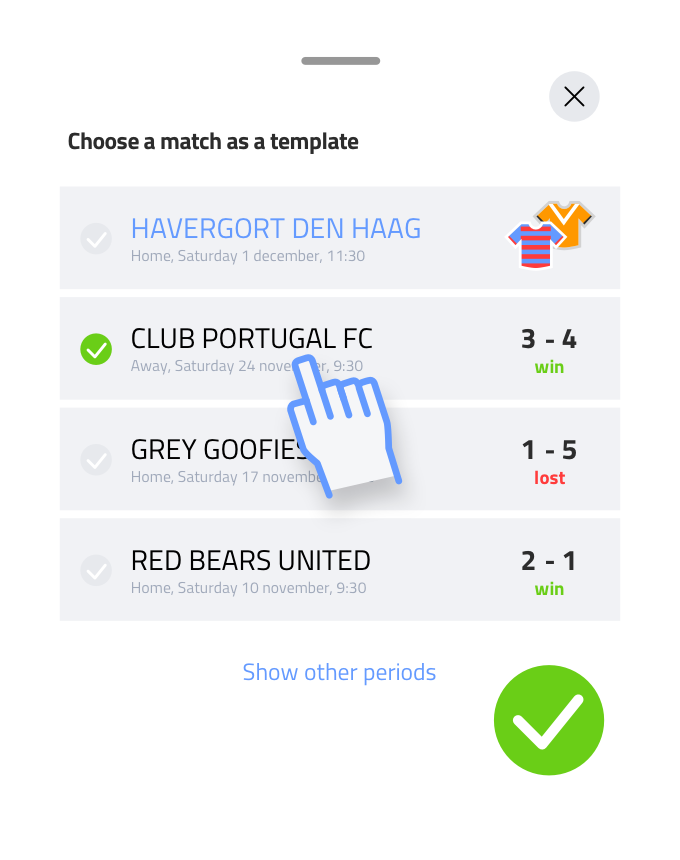
Choose a match as template (Premium feature) Make a choice for a match that has already been played or that has already been set. All settings (including player list, line-up, substitution blocks and formation) are taken over. Is the match not listed? You can also choose a different period: choose ‘show different period’.
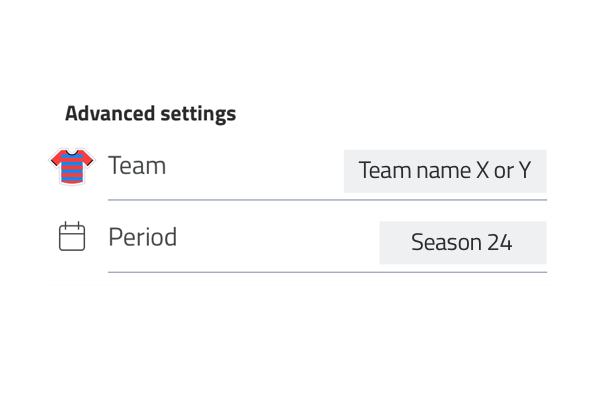
Advanced settings: Here you can also assign the match to another team. And you can assign the competition to a specific period. By default, the active period and the active team will of course be shown here as preference.

Click on the green right arrow for Next
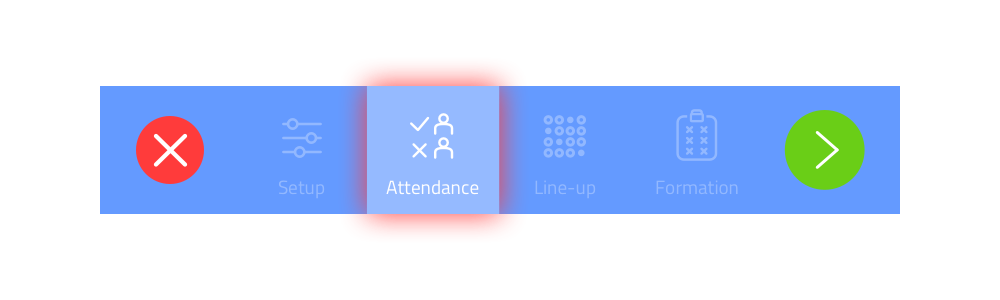
Match attendance
Now you can start with some administrative work. You may have received a message of absence or a player has been injured.
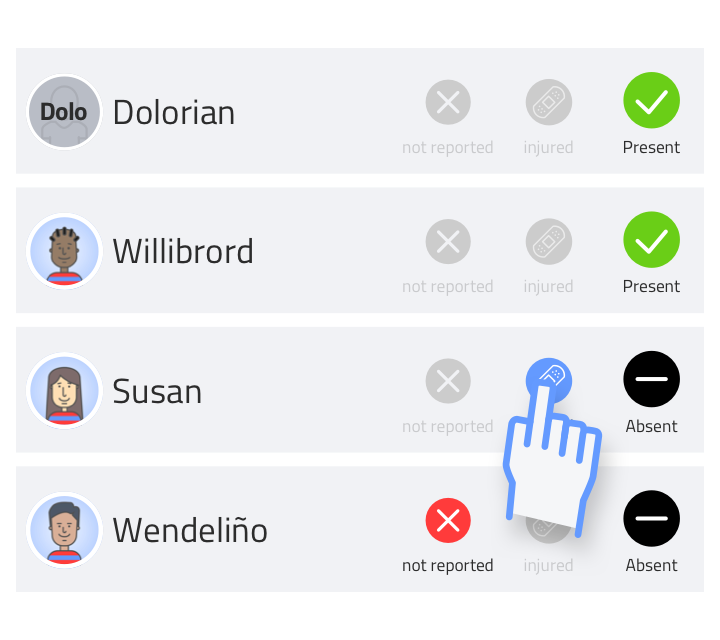
When a player is absent, he will not be included in the further match setup. To do this, press the check mark to indicate the player as absent. After this, you can optionally indicate additional information such as “not reported” its absence and / or is “injured”.
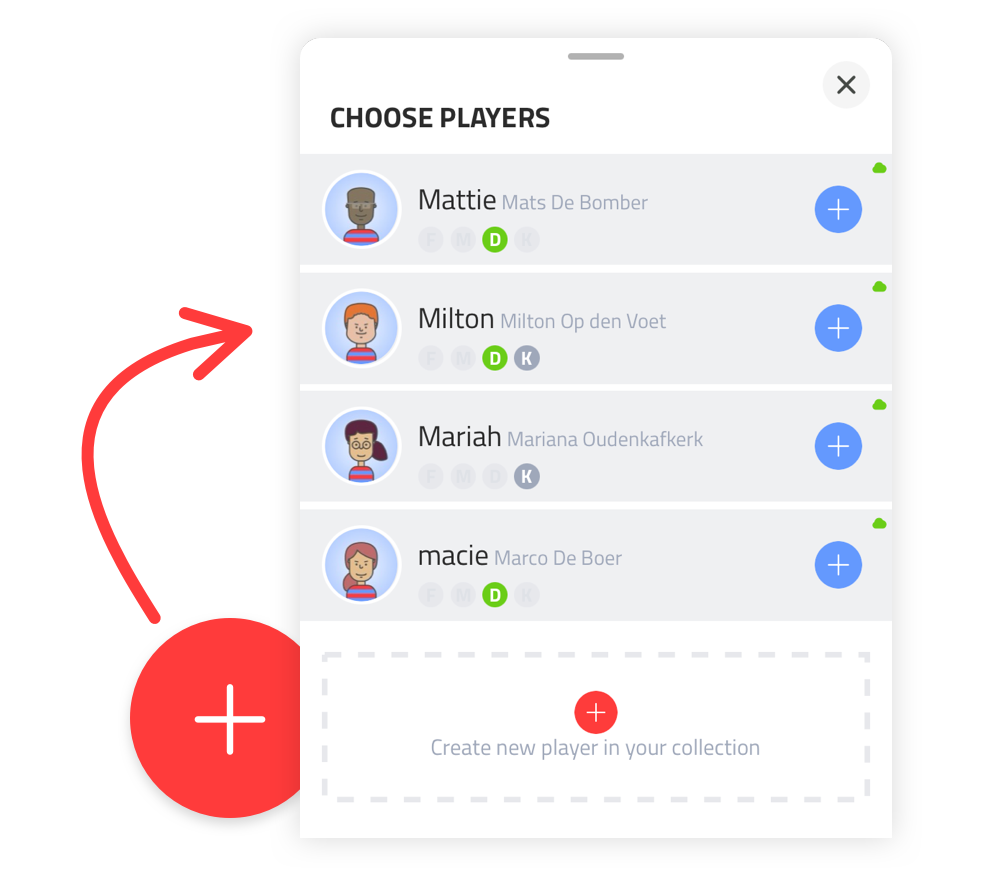
Add a guest player
Press the red plus at the bottom right. A popup with players will appear. Here the players are shown who do not belong to the team selection. And you immediately have the option to create a new player. In case an unknown player needs to be added last minute.
The players added here do not have the administrative options to report injuries and absence. After all, they do not belong to the team selection, they are referred to as “guest player”.
Click on the green right arrow for Next
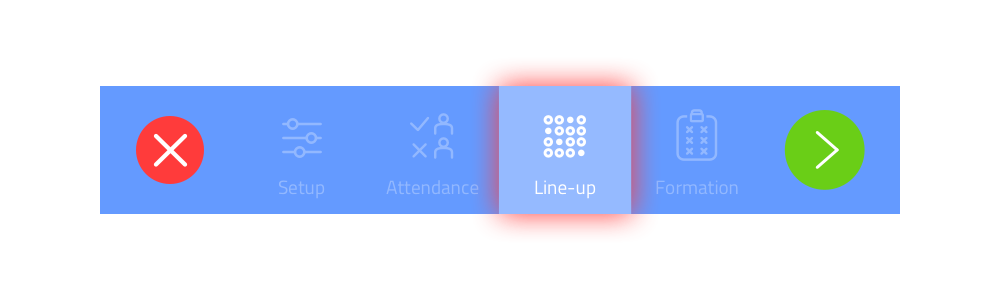
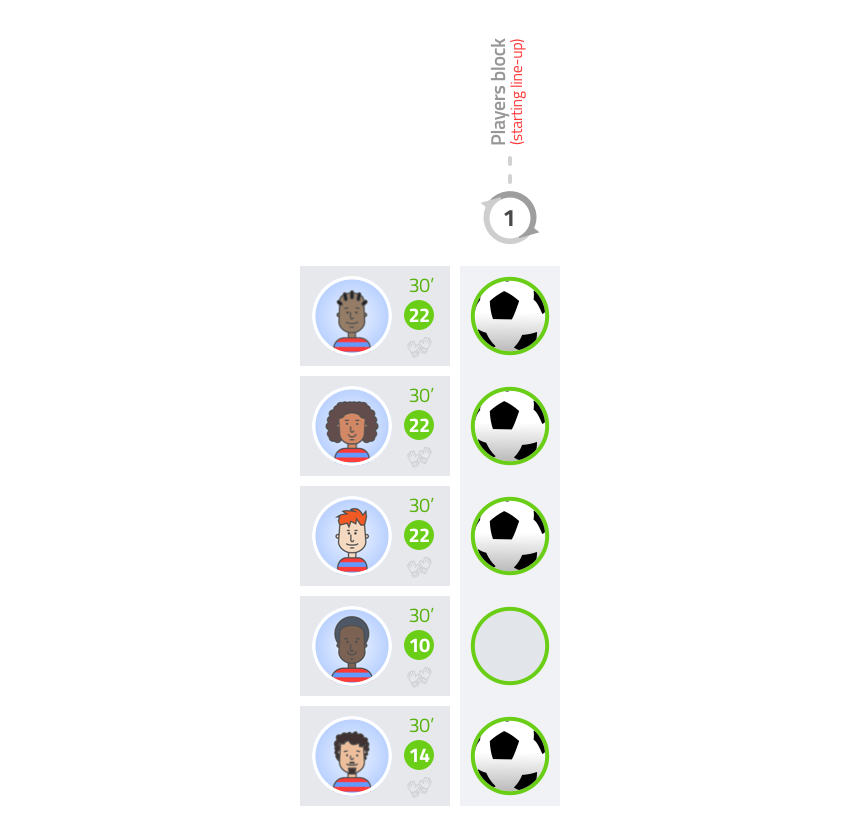
Line-up: players blocks and starting line-up
Now you can get started with the player blocks when you are setting up a match with substitution management. You will see one only player block if you want to play the match without substitution management (manual substitution).
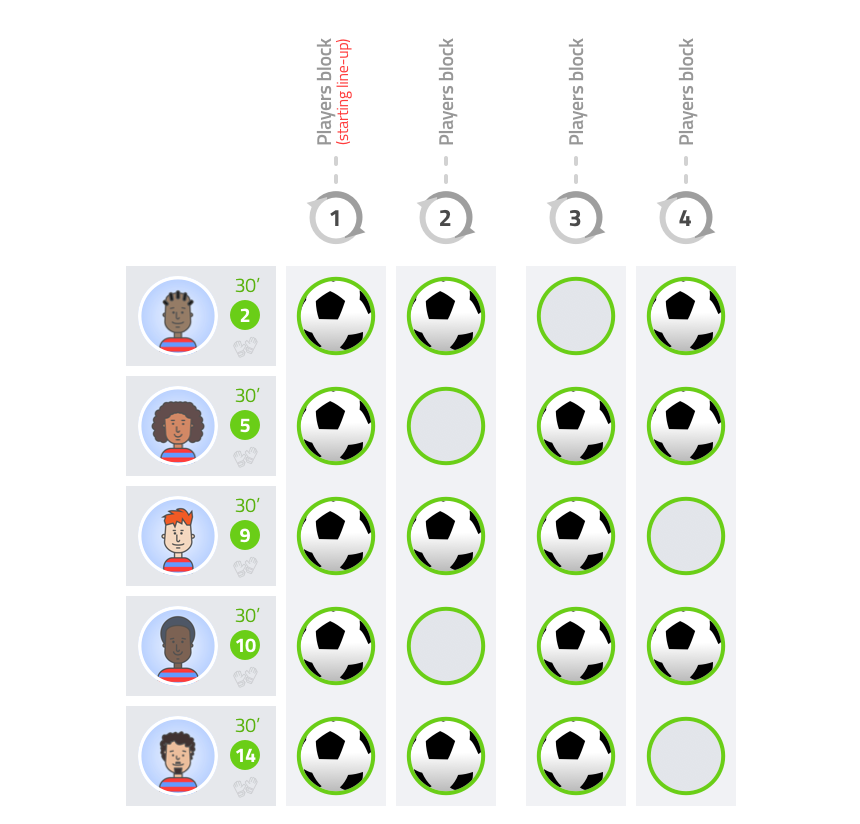
Match with substitution management (multiple player blocks visible)
Match without substitution management (one player block visible)
The first player block is your starting line-up. Without substitution management, this will be the only player block you will see. Press the balls behind the players to assign them playing time. You can read more about setting up a match with substitution management here.
The toolbar at the top of the screen
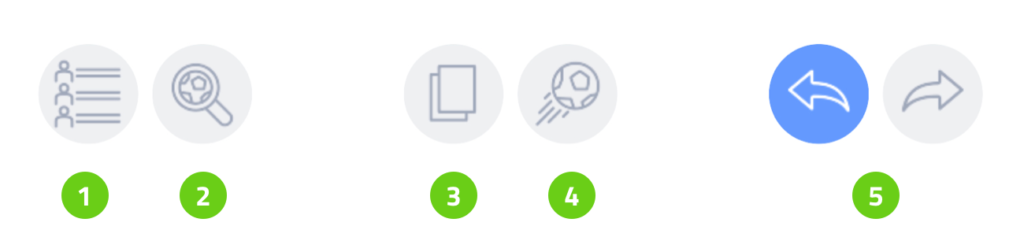
- Opens additional player information screen
- Zoom out for a better overview (there are 3 zoom levels, keep pressing)
- Activate copy and paste of player blocks
- Choose or save template of a complete match setup (Premium feature)
- Recover or step forward
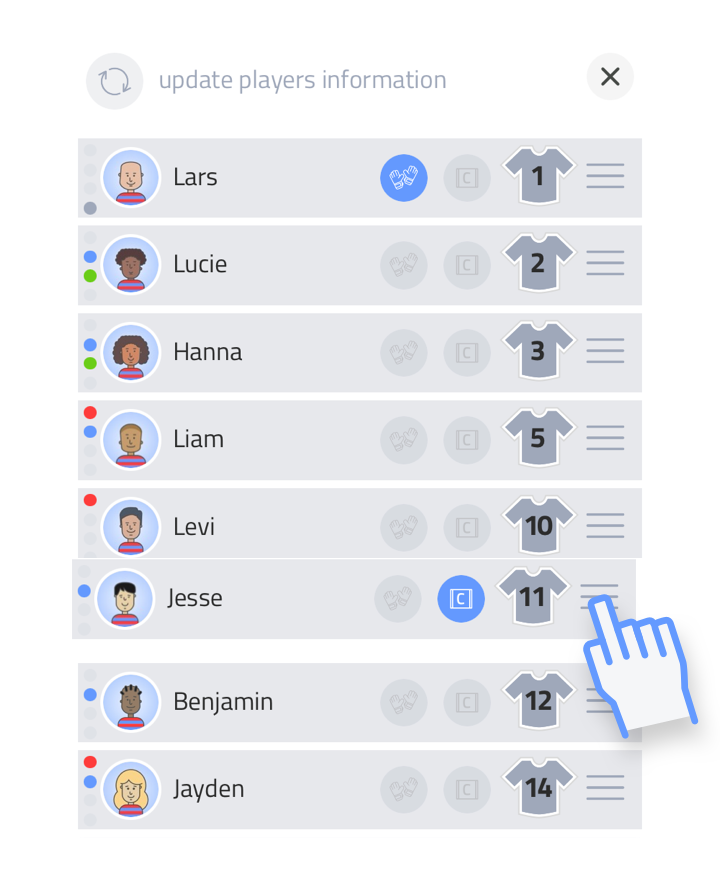
Additional player information
There is a refresh icon at the top left. When you press this, the most recent player information will be retrieved. This is useful when, for example, you have added pictures of players after you have set up the match.
You can also adjust the shirt numbers, and appoint a captain and goalkeeper.
By holding the three lines on the right you can drag the players in the desired order. Handy when you want to keep field positions a bit together, for example.
Click on the green right arrow for Next

Formation
In this screen you can set up the formation belonging to the corresponding player blocks. You walk through all player blocks by pressing the icon at the top left of the screen. Another option is to press the player block indicators at the bottom of the screen, just above the match wizard menu.
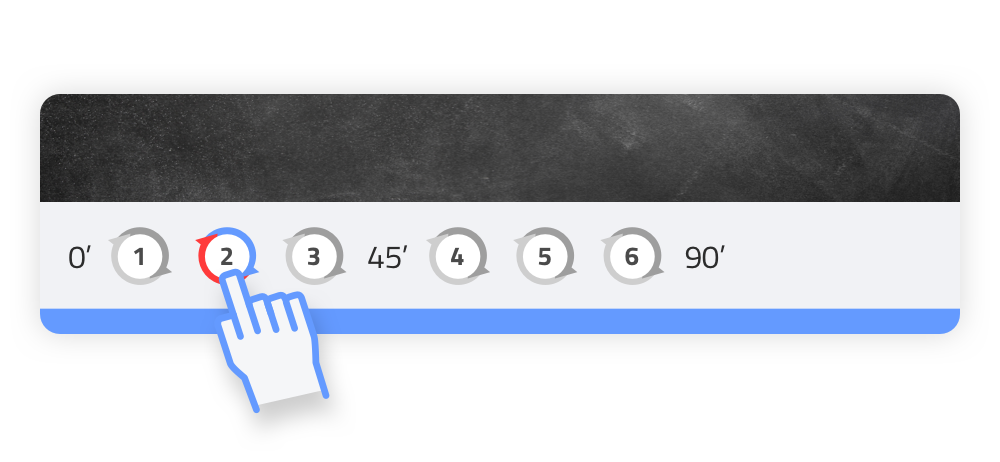
Press the player block numbers at the bottom of the screen one by one.

You can drag and drop players at the position where you want. You can also substitute or change position them here if you wish. Drag one player over another and release.
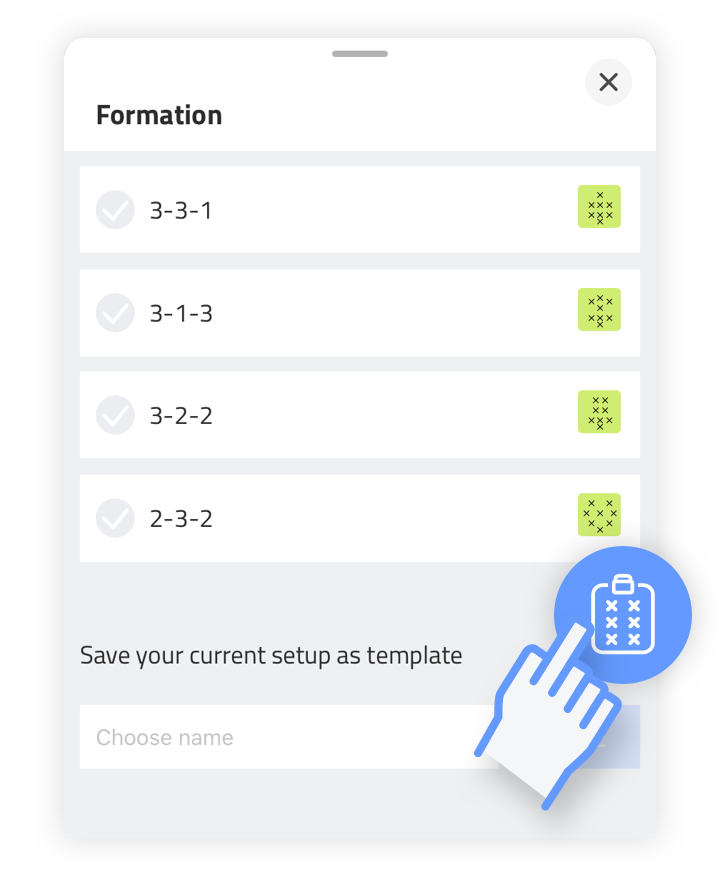
By pressing the formation icon at the bottom right you can choose and apply standard formations. Do you have a Premium subscription? Then you can create your own formations and save and apply them here.
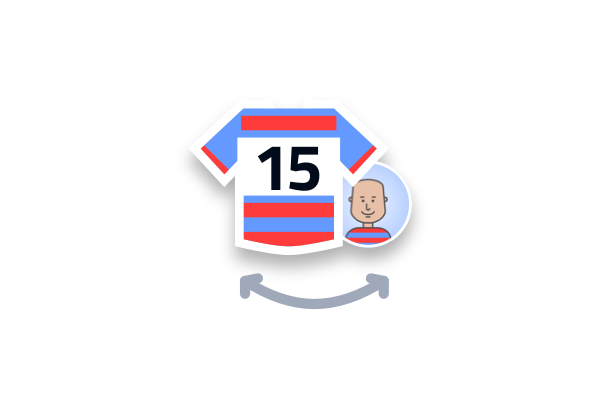
You can choose by pressing the shirt number / photo icon whether the photos of the players are shown or the shirts with the numbers.
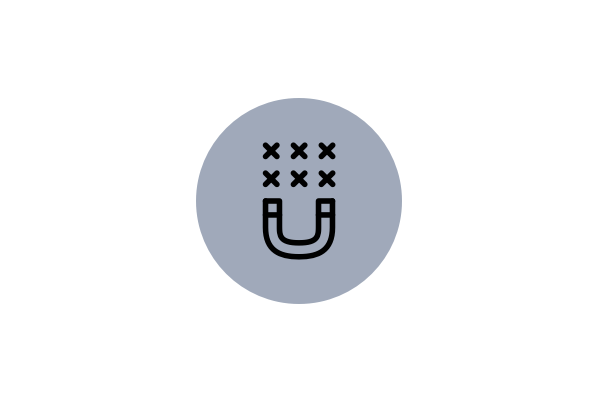
Do you like to work neatly? Then press the magnet icon to the left of the formation icon. With this you switch on the magnetic grid and every player you move is neatly placed on this grid.

Press the green tick to save the match and return to the match overview